
Fisher & Paykel Oven Instruction Manual: A Comprehensive Guide
Welcome! This detailed guide provides essential information for operating your Fisher & Paykel oven, covering safety, features, and troubleshooting for optimal performance;
Fisher & Paykel ovens are renowned for innovative design and advanced cooking technology. This manual serves as a comprehensive resource, unlocking the full potential of your appliance. From standard baking to specialized cooking modes, understanding your oven’s capabilities ensures delicious results.
Explore features like pyrolytic cleaning and precise temperature control. Accessing downloadable manuals and warranty details is simplified, guaranteeing a seamless ownership experience. This guide empowers you to confidently utilize every aspect of your Fisher & Paykel oven.
Understanding Oven Controls
Mastering the controls is key to utilizing your Fisher & Paykel oven effectively. The intuitive interface allows for precise adjustments to temperature, cooking time, and mode selection. Familiarize yourself with the control panel layout and display indicators for a streamlined cooking process.
This section details each function, ensuring you can confidently navigate settings and customize your cooking experience. Proper understanding of these controls unlocks the oven’s full potential, delivering consistently excellent results.
Control Panel Overview
The control panel features a user-friendly design with clearly labeled buttons and a digital display. Key components include the function selector dial, temperature adjustment buttons, timer controls, and various mode indicators. These elements work together to provide precise oven control.

Understanding the placement and function of each button ensures effortless operation. The display provides real-time information on cooking settings, enhancing your overall cooking experience and allowing for accurate adjustments.
Display Indicators and Symbols
The oven display utilizes various indicators and symbols to communicate its status. A clock icon shows the current time, while temperature indicators display the set and actual oven temperatures. Symbols represent different cooking modes – bake, roast, convection – for quick identification.
Error codes alert you to potential issues, and a lock symbol indicates the child lock is active. Familiarizing yourself with these symbols ensures you can easily monitor and control your oven’s functions.
Initial Oven Setup
Before first use, remove all packaging materials from both the oven interior and exterior. Ensure all protective films are removed. A first-time use cycle, often involving running the oven at a high temperature for a period, is recommended to burn off manufacturing residues.
Proper setup includes setting the correct clock time, crucial for timed cooking functions. Refer to the dedicated ‘Setting the Clock’ section for detailed instructions on configuring the oven’s time display.
First-Time Use Instructions
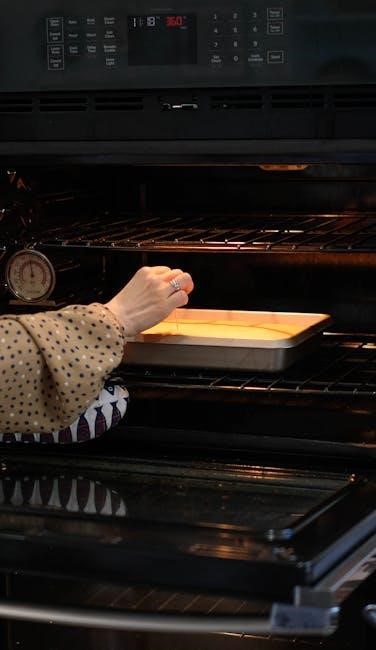
To prepare your new Fisher & Paykel oven, run a high-heat cycle before cooking food. This burns off any manufacturing residues and associated odors. Set the oven to 400°F (200°C) and let it run empty for at least one hour.
Ventilate your kitchen during this process, as some smoke may be produced. After the cycle, allow the oven to cool completely before using it for cooking. This ensures a clean and odor-free cooking experience.
Setting the Clock
To set the clock on your Fisher & Paykel oven, locate the ‘Clock’ or ‘Time Set’ button on the control panel. Press and hold this button until the hour display flashes. Use the arrow buttons to adjust the hour, then press the same button again to set the minutes.

Confirm your settings by pressing ‘Start’ or allowing the clock to set automatically. Accurate timekeeping is crucial for timer functions and programmed cooking features.
Cooking Modes Explained
Fisher & Paykel ovens offer diverse cooking modes to suit various recipes. Bake Mode provides consistent heat for standard baking. Roast Mode is ideal for meats and poultry, utilizing higher temperatures. Convection Bake ensures even heat distribution, reducing cooking times and enhancing results.
Explore additional modes like broil, proof, and warm for specialized culinary tasks, maximizing your oven’s versatility.
Bake Mode – Standard Baking
Bake Mode is your go-to setting for everyday baking needs. It delivers consistent, gentle heat from the bottom element, perfect for cakes, cookies, and casseroles. Ensure even cooking by positioning your dish in the center of the oven rack.
Preheating is recommended for optimal results. Adjust temperature and time based on your recipe, achieving perfectly baked goods every time!
Roast Mode – For Meats and Poultry
Roast Mode utilizes a high-heat setting, ideal for browning and crisping meats and poultry. Heat originates primarily from the top element, creating a succulent interior with a beautifully browned exterior. Utilize a roasting pan with a rack for optimal air circulation.
Monitor internal temperature with a probe for precise doneness. Remember to baste frequently for enhanced flavor and moisture!
Convection Bake – Even Heat Distribution
Convection Bake employs a fan to circulate hot air throughout the oven cavity, ensuring consistent temperatures and remarkably even baking results. This mode is perfect for cookies, cakes, and casseroles, reducing cooking times and eliminating hot spots.
Consider reducing the recipe temperature by 25°F when using convection for optimal outcomes. Multiple racks can be utilized simultaneously!
Using Manual Mode
Manual Mode grants you complete control over both oven temperature and cooking time. This is ideal for recipes requiring precise adjustments or when you prefer a traditional cooking experience. Simply select ‘Manual’ on the control panel.
You’ll then independently set your desired temperature and duration, allowing for customized cooking tailored to your specific needs and preferences.
Setting Temperature Manually
To set the temperature manually, first ensure the oven is in Manual Mode. Use the temperature up and down arrow buttons on the control panel to select your desired cooking temperature. The selected temperature will be displayed prominently on the oven’s digital screen.
Confirm your selection, and the oven will begin preheating to the specified degree.
Adjusting Cooking Time
Adjusting cooking time is simple using the control panel. After setting the temperature, press the ‘Time’ or ‘Cooking Time’ button. Utilize the arrow buttons to increase or decrease the cooking duration to your recipe’s requirements. The remaining cooking time will be clearly visible on the display.
Press ‘Start’ to initiate the timer.
Oven Safety Features
Fisher & Paykel ovens prioritize safety with several key features. The Child Lock function prevents unintended operation, safeguarding children. A Cool Touch exterior minimizes burn risks from the oven’s surface during operation. These features, combined with robust construction, ensure a secure cooking experience.
Always supervise children near the oven.
Child Lock Function
Activating the Child Lock prevents accidental oven operation, crucial for households with young children. Typically, this involves pressing and holding two specific buttons simultaneously on the control panel – consult your model’s manual for exact instructions.
The display will indicate when the lock is engaged. Repeat the process to disable it.

Cool Touch Exterior
Safety First! Fisher & Paykel ovens feature a “Cool Touch” exterior, meaning the oven’s door and surrounding surfaces remain relatively cool to the touch during operation. This design minimizes the risk of burns from accidental contact, especially important for families with children.
However, some areas may still be warm, so caution is always advised.
Self-Cleaning Function
Effortless Cleaning! Many Fisher & Paykel ovens offer a self-cleaning function, utilizing high temperatures to burn away food residue. Before initiating, remove racks, cookware, and any loose debris. Ensure proper ventilation during the cycle, as it produces odors.
Follow the detailed instructions in your oven’s manual for safe and effective self-cleaning.
Preparing for Self-Clean Cycle
Essential Steps! Prior to initiating the self-clean cycle, meticulously remove all oven racks, baking stones, and any cookware. Wipe up any large spills or loose food particles from the oven interior. Ensure the oven door can fully close and latch securely.
Check for any items left inside, and ventilate the kitchen, as the process can generate odors.
Self-Clean Cycle Operation
Initiating the Clean! Select the “Self-Clean” function on your oven’s control panel. Choose the desired cycle duration – options typically range from 2 to 4 hours, depending on soil level. The door will automatically lock for safety during operation.
Avoid opening the door until the cycle completes and the oven has cooled. A burning smell is normal.
Troubleshooting Common Issues
Facing Problems? If your oven isn’t heating, check the power supply and ensure the control panel is responding. Error codes displayed indicate specific issues; consult the manual for their meanings. A locked door prevents operation – disable the child lock.
For persistent problems, disconnect power and contact Fisher & Paykel support.
Oven Not Heating
No Heat? First, verify the oven is properly connected to a functioning power outlet. Confirm the control panel illuminates and responds to selections. Ensure no error codes are displayed, as these pinpoint the issue. Check if the oven door is fully closed; some models won’t heat if ajar.
If issues persist, consult the full manual or contact support.
Error Codes and Their Meanings
Decoding Alerts: Fisher & Paykel ovens utilize error codes to diagnose problems. A flashing code on the display indicates a specific issue, like a sensor malfunction or temperature regulation failure. Consult your oven’s manual – often downloadable online – for a complete list.
Common codes relate to temperature sensors, heating elements, or control board errors. Note the code before contacting support.
Downloading Oven Manuals
Accessing Resources: Lost your physical manual? No problem! Fisher & Paykel provides convenient access to digital versions online. First, locate your oven’s model number – typically found on a plate inside the oven door or on the back.
Then, visit the official Fisher & Paykel website and use the model number to download the appropriate PDF manual for detailed instructions and support.
Finding Your Oven Model Number
Locating Identification: Before downloading your oven’s manual, you’ll need its specific model number. This unique identifier ensures you receive the correct documentation. Typically, the model number is located on a sticker or plate inside the oven door frame.
Alternatively, check the back of the oven itself. This number is crucial for accessing the right manual on the Fisher & Paykel website.
Official Fisher & Paykel Website for Manuals
Accessing Resources: For the most up-to-date manuals and guides, visit the official Fisher & Paykel website. Navigate to their support section and utilize the search function, entering your oven’s model number.
You can easily download PDF versions of user manuals, installation guides, and specification sheets directly from their site, ensuring you have the correct information at your fingertips.
Warranty Information
Coverage Details: Fisher & Paykel ovens are backed by a warranty covering manufacturing defects in materials and workmanship. Specific coverage periods vary depending on the model and region; consult your warranty documentation for precise details.
To initiate a warranty claim, retain proof of purchase and contact Fisher & Paykel customer support. Ensure you have your model and serial number readily available for efficient processing.
Warranty Coverage Details
Standard warranty typically covers parts and labor for one year from the original purchase date. Extended warranties may be available for purchase, offering additional coverage for extended periods. Coverage excludes normal wear and tear, misuse, or unauthorized repairs.
Specific exclusions often include cosmetic damage, accidental damage, and issues resulting from improper installation. Retain all documentation for claim processing.
How to Make a Warranty Claim
To initiate a claim, contact Fisher & Paykel customer support with your model number, purchase date, and a detailed description of the issue. Proof of purchase is essential. They may request photos or videos to assess the problem.
Authorized service may be required for diagnosis and repair. Fisher & Paykel will guide you through the process, potentially arranging a technician visit.
Cleaning and Maintenance
Regular cleaning ensures optimal performance and longevity. Daily wipe down the interior with a damp cloth after each use. For deeper cleaning, remove racks and trays, washing them with warm, soapy water.
Avoid abrasive cleaners that can damage the oven’s surfaces. Consider the self-cleaning function (if equipped) for periodic thorough cleaning, following safety guidelines.
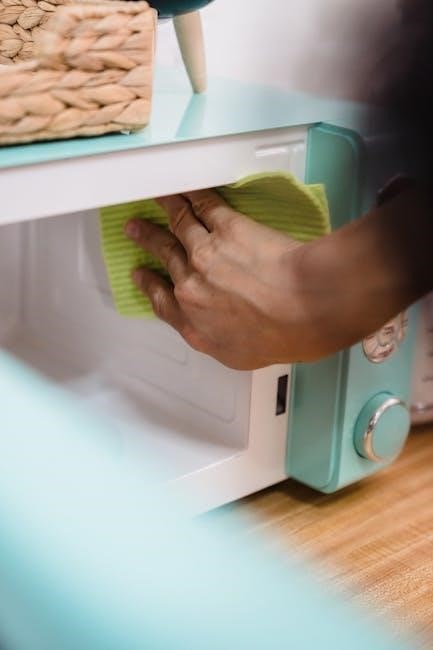
Daily Cleaning Procedures
After each use, allow the oven to cool completely before cleaning. Wipe down the interior surfaces with a soft, damp cloth to remove food splatters and spills. Avoid harsh abrasives or scouring pads, as they can damage the enamel.
Remove loose debris and crumbs from the oven floor. Regularly clean the door glass with a glass cleaner for optimal visibility. This simple routine maintains hygiene and prevents buildup.
Deep Cleaning Recommendations
For a thorough clean, perform a deep clean monthly or as needed. Utilize the self-clean function if your model has one, following safety precautions. Alternatively, use a dedicated oven cleaner, ensuring proper ventilation;
Remove racks and trays for separate cleaning. Inspect and clean the door seals to maintain efficiency. A deep clean restores oven performance and extends its lifespan, ensuring optimal cooking results.
Accessories and Optional Features
Enhance your cooking experience with available accessories! Fisher & Paykel offers various oven racks and baking trays designed for optimal performance. Consider a temperature probe for precise cooking, especially for roasts and meats, ensuring perfect results every time.

These additions maximize oven versatility and convenience. Check the official Fisher & Paykel website or authorized retailers for compatible accessories tailored to your specific oven model.
Available Oven Racks and Trays
Fisher & Paykel offers a selection of oven racks and trays to suit diverse cooking needs. Standard racks provide general-purpose support, while specialized trays are ideal for baking, roasting, and even broiling. Durable construction ensures longevity and even heat distribution.
Consider heavy-duty racks for larger items or frequent use. Explore options like enamel-coated trays for easy cleaning and non-stick performance, enhancing your culinary creations.
Temperature Probe Usage
The temperature probe allows precise cooking by monitoring internal food temperature. Insert the probe into the thickest part of the meat, ensuring it doesn’t touch bone. Set your desired final temperature within the oven’s control panel.
The oven will automatically switch to a keep-warm setting once the target temperature is reached, guaranteeing perfectly cooked results every time. Clean the probe thoroughly after each use.
Understanding Pyrolytic Cleaning (If Applicable)
Pyrolytic cleaning utilizes extremely high temperatures to burn off oven residue, leaving only a light ash. Remove all racks and accessories before initiating this cycle. Ensure adequate ventilation during operation, as some odor may be present.
The door automatically locks for safety during the high-heat process. Once cooled, simply wipe away the ash with a damp cloth. Always follow safety precautions detailed in your oven’s manual.
How Pyrolytic Cleaning Works
Pyrolytic self-cleaning heats the oven cavity to incredibly high temperatures – typically around 900°F (482°C). This intense heat carbonizes food spills, grease, and baked-on residue into ash. The process occurs within a sealed environment, minimizing smoke and odor.
Once the cycle completes and the oven cools, a small amount of ash remains, easily wiped away. This method eliminates the need for harsh chemical cleaners and manual scrubbing, offering a convenient cleaning solution.
Safety Precautions for Pyrolytic Cleaning
Prior to initiating a pyrolytic cycle, remove all oven racks, baking stones, and any foil. Ensure the kitchen is well-ventilated, as some odor may be emitted during the high-heat process. Keep children and pets away from the oven during operation due to the extremely high temperatures.
Avoid touching the oven door during or immediately after the cycle; it will be very hot. Never attempt to open the door until the oven has fully cooled and the lock has disengaged.
Frequently Asked Questions (FAQ)
Q: Why isn’t my oven heating? A: Check the power supply and ensure the control panel is not locked. Q: What do error codes mean? A: Refer to the troubleshooting section for a comprehensive list of codes and solutions. Q: Where can I download a manual? A: Visit the official Fisher & Paykel website.
Q: How do I activate the child lock? A: Consult the ‘Oven Safety Features’ section for detailed instructions. Q: Is pyrolytic cleaning safe? A: Follow all safety precautions outlined in the dedicated section.
Contacting Fisher & Paykel Support
Need assistance? For prompt support regarding your Fisher & Paykel oven, visit their official website to access online resources, FAQs, and troubleshooting guides. Alternatively, you can directly contact their customer service team via phone or email.
Detailed contact information, including regional support numbers, is readily available on the Fisher & Paykel website. Ensure your model number is handy for efficient assistance.